Some people wake up on a Sunday morning and leisurely grab their newspaper or turn on the TV to catch some cartoons or Meet the Press.  Not this girl.  I wake up on Sunday morning and find a huge hole in my kitchen wall that my weekend-warrior husband has created.  (Don’t worry, he filled the hole in with a new sliding glass door.)

Notice Buster waaaay back in the yard not wanting to be anywhere near the chaos.  He would rather take advantage of the last days of summer by playing in his pool (which we have to keep on an incline due to the number of holes that have formed over the past couple of months).

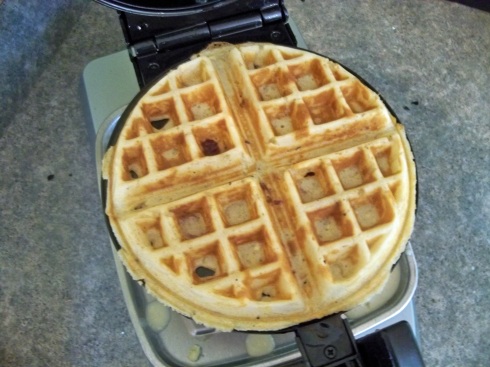
But all of that aside, it was still Sunday morning and cold cereal just wouldn’t cut it.  There are plain old waffles, but there are always waffles.  Or at least there have always been waffles ever since Mother’s Day when Jake got me my waffle maker.  It’s one of those presents that the giver benefits from just as much as the receiver.  So, I hunted around on the internet for waffle inspiration and I poked and prodded and eventually decided that the best course of action would be to put brown-sugar-covered bacon in the waffles.  Just throw it right in the batter. 

It’s like adding blueberries without having to worry about all those pesky antioxidants getting in the way.  And they turned out great.  There was salt and there was sugar and there was one very happy pregnant woman.

Bacon Brown Sugar Waffles

5 slices of bacon
3 tablespoons brown sugar, plus 2 tablespoons for the batter
2 eggs
2 cups all-purpose flour
1 3/4 cups milk
1/2 cup oil 
4 teaspoons baking powder
1/2 teaspoon salt 
3/4 teaspoon vanilla extract

Cook the bacon in a frying pan until it is almost crispy.  Cover the bacon with 3 tablespoons of brown sugar and let it sit for a minute to melt and for the bacon to finish cooking. (Don’t flip it!  That just makes a crazy sticky mess.  I learned the hard way.)  Remove the bacon and after letting it cool, cut it up into small pieces.

Beat the eggs until they are light and fluffy.  Then mix in the milk, oil, baking powder, salt, vanilla, and the other two tablespoons of brown sugar.  Fold in the bacon pieces.

Spray a pre-heated waffle iron with non-stick spray and pour the batter in.  Cook until crispy and golden, and eat warm with maple syrup.

For some reason, summer just doesn’t seem very “pasta” to me.   Pasta is just too hearty to eat when it is hot outside.  Or maybe it is the temperature and not the heartiness because I eat cold pasta (pasta salad).  I don’t know.  But that’s not the point anyway.  The point is that it is getting cold in New England!  Hearty meals are welcome in my home again.

At the grocery store yesterday I bought stuff to make lasagna and chili and slow cooker pork.  Look at that menu and try to tell me that winter isn’t around the corner. 

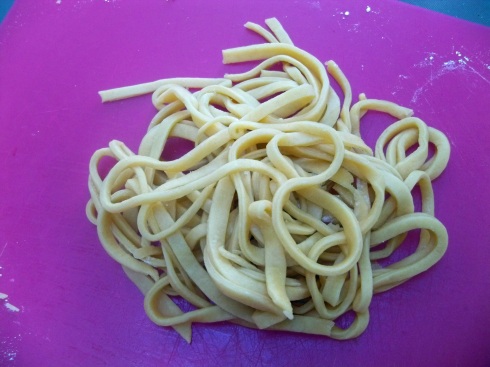
Pasta is just fine when it comes out of the box.  Really, it is.  But it is also pretty darn easy to make from scratch, and it ends up tasting so much fresher and just delicious in general.  So why not throw together a homemade pasta recipe every once in a while?  I don’t have a special machine or anything, so I use a rolling pin and pizza cutter, but that hasn’t caused any problems.  Nobody wants every piece to be exactly the same anyway, right?  Just make sure that you roll it pretty thin because it does puff up a little bit when it cooks.

This time that I made it, I just tossed the pasta with butter and parmesan cheese and then topped with herbs.  But some sort of tomato sauce would be good too.  Or making it into some sort of ravioli or pierogi.  Yum.  Maybe next time.

Homemade Pasta (this serves two, but feel free to double it):

1 cup flour
1 pinch salt
1 egg
1 Tbsp milk
2 Tbsp olive oil

In a stand mixer (or if you want to do this all with your hands then more power to you, but be warned that it can be a mess), mix the flour and salt.  Then add in the egg, milk, and olive oil and mix until they are all combined and the dough is a little bit stretchy.  Maybe about 5 minutes. 

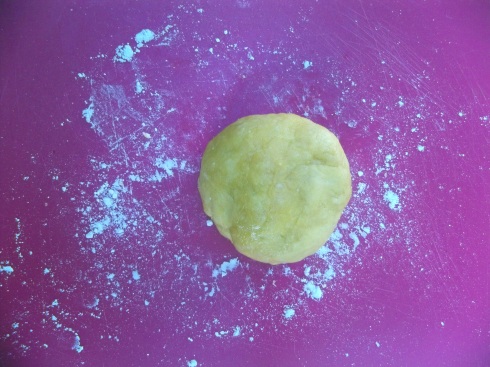
Flour a clean surface and put the dough on top.  Adding more flour as needed, work the dough into a ball.  Wrap the ball in seran wrap and let it sit for about half an hour.  Don’t rush this part!  Then, roll the ball out and cut into whatever shape you want.  In salted and oiled boiling water, cook the pasta for about 4-5 minutes.  You can taste it to see if it needs more time.

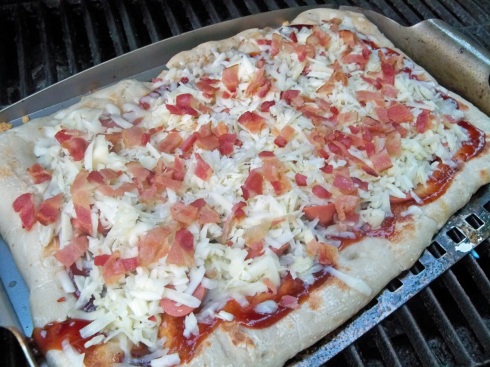
Jake and I went to a picnic for the local PanCAN affiliate, and we took hot dogs.  Lots and lots of hot dogs.  And the turnout was… eehhh… not so great.  So, needless to say, we had a bunch left over and I have spent the past week trying to figure out how to cook them in different and interesting ways.  There are only so many meals in a row that you can open up the Hebrew National bag and throw a dog on a bun with ketchup and relish, right?  So, that’s how this pizza was born.

Normally, I stay away from the grill and let Jake live in peace, but this time I was determined to cook on the grill.  And then I broke the darn thing.  Or so I thought.  As it turned out, it ran out of gas, but I was dreading having to go inside and let Jake know that the one time I ventured outside I broke the grill.  He switched out the gas tank and all was well.  Until I spilled BBQ sauce on the grates and it dripped inside.  I guess that’s bad.  I don’t know.  But from that point on I had a grilling chaperone.

I will probably never be allowed near the grill unsupervised again, but all was well as soon as Jake tasted the pizza.  He loved it!  And at least I remembered to turn it off and turn the gas off when everything was said and done.  This house isn’t going to blow up on my watch. 

If you know of any other creative hot dog recipes let me know.  There is a whole Costco-sized stash in the freezer just waiting to be defrosted! 

Grilled Hot Dog BBQ Pizza

1 package raw pizza dough (or a pre-cooked one would probably work ok – just skip the part about cooking the dough)
1/2 cup BBQ sauce
2 hot dogs, thinly sliced
2 cups cheddar cheese
5 slices of cooked bacon, diced

Let the dough come to room temperature so that it is easier to handle (I usually leave it on the counter for an hour, but it doesn’t really need that much time) and preheat the grill.  Spray either the grill grates or aluminum foil/veggie try with grill-safe cooking spray (depending on how brave you are feeling).  Place the dough either directly onto the grill or onto the foil and let it cook for about 3 minutes on each side.  Then, right on the grill, spread the BBQ sauce across the dough, and add the hot dogs, cheese, and bacon.  Close the grill and let it cook until everything is melted and bubbly, about 5-7 minutes.  Remove from the heat, let it cool for a couple of minutes, and then eat warm.  It is also good cold the next day if you are into that kind of thing.

Hooray!  The nursery is pretty much complete at this point.  Jake worked really hard to get it done before the shower, and then soon afterward we filled it up with a ton of stuff from the sunroom because he had SO much fun replacing the ceiling in the nursery that he decided he would continue the trend.  And the sunroom needs insulation now that it will function as an actual guest room. 

This room was a labor of love, that’s for sure.  Jake worked on it pretty much non-stop for several weeks, his dad came to help for a weekend, Meghan helped with the decorating (everyone should have friends who are merchandisers), and I… well, I worked on growing the child.  And I took over most of the dog walking/ dish cleaning duties while Jake was busy in the room.   That must count for something, right?

We still need to put an area rug in the room, get a cushion for the rocking chair, and hopefully get front-facing book racks for the big blank wall that doesn’t have anything on it right now.  Or just pictures.  Not sure yet.

The rocking chair is actually the one that my mom and dad used when Dan and I were babies.  And somehow it is still in really good shape!  Lucky break. And the closet is completely filled with baby essentials already (and there is actually a lot more now than there was when the picture was taken!).  Holy guac, who knew how much stuff you needed to be a parent?! 

Jake and I are pretty much all set for the baby to come.  The nursery is almost complete.  The gear is put together (the perks of marrying an engineer).  My belly is huge.  So now we just have to sit around for another month and a half and wait for her to make her grand entrance.  What to do, what to do…. 

I know!  Corn chowder!  As though we don’t already eat enough corn in this place.  But it’s summer and it’s corn season, so we might as well take this golden opportunity (pun intended) to eat as much as possible.  What’s funny is that there really isn’t anything as far from summer food as a hot, thick chowder.  It’s a bit of an oxymoron.  But the past week has been cold and rainy so everything worked out well and Jake and I didn’t have too much of a food identity crisis.

Originally, the idea was to make jalapeno cheddar corn bread.  But corn bread isn’t really a meal, and I didn’t want to have to make anything else (lazy).  So I made a chowder instead.  And it was deeelicious. 

The jalapenos make a big difference in the flavor.  They really gave the soup a good kick that you couldn’t get from plain old salt and pepper.  Obviously, use more or less as you like, but I definitely wouldn’t omit them.  Jake usually doesn’t like jalapenos and even he thought that they were great in this recipe. 

Cheesy Jalapeno Corn Chowder (adapted loosely from Ina Garten):

8 – 10 strips of bacon
2 tablespoons of olive oil
1 large onion, diced
2 tablespoons butter
1/3 cup flour
8 cups chicken broth
3 large light-skinned potatoes, unpeeled and cubed
2 tablespoons chopped jalapenos
2 teaspoons salt
1 teaspoon pepper
8 cups of corn (if fresh, cook the corn in boiling water for about 3 minutes, if frozen just use the corn as is)
2 cups heavy cream
2 cups shredded cheddar cheese
1 cup shredded monterey jack cheese

In a large stockpot or dutch oven, cook the bacon and olive oil until the bacon is crisp. Remove the bacon set it aside, leaving the fat and olive oil in the pot. Reduce the heat to medium, add the onions and butter, and cook for about 10 minutes, until the onions are translucent.  Don’t forget to stir the onions to keep them from burning.

Stir in the flour, salt, and pepper and cook for 3 minutes. Add the chicken stock, jalapenos, and potatoes, bring to a boil, and simmer uncovered for 15 minutes, until the potatoes are tender.  Add the corn to the soup, then add the heavy cream and cheese. Cook for 5 more minutes until the cheese is melted.  Crumble the bacon on top.  The chowder can be refrigerated for a few days, and the leftovers are just as good as the first night.  Yum.

For some reason, my life has been surrounded by fruit gratin lately.  Ina Garten was making one on Barefoot Contessa and then there was one Smitten Kitchen made with raspberries and sour cream which sounded… ummm… scary.  So I decided to make it with plain yogurt instead.  Which, yes, I realize tastes almost the same as sour cream.  But it sounds different in my head and my version tasted just great, so I’m thinking I won’t even voyage into the land of sour cream mixed with fruit. 


The first time I made this it was with peaches, and it was delightful except for the fact that I am an idiot and can’t get through my brain that sometimes you just need to use the full-fat version of food if you want it to taste good.  I had this fat-free plain yogurt and – no surprise – was kind of thin and not as flavorful as I would have liked.  It was fine but there wasn’t really any “wow” factor.

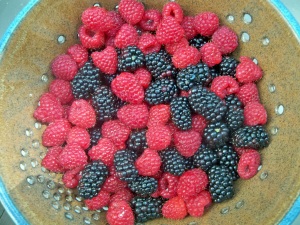
Fast forward to this past weekend when I had fresh raspberries and blackberries in the fridge.  Why not give the whole fruit gratin thing another try?  This time I used greek yogurt and a couple of drops of pure vanilla extract and it was amazing the difference it made!  I would definitely advocate using real, fatty, delicious yogurt.

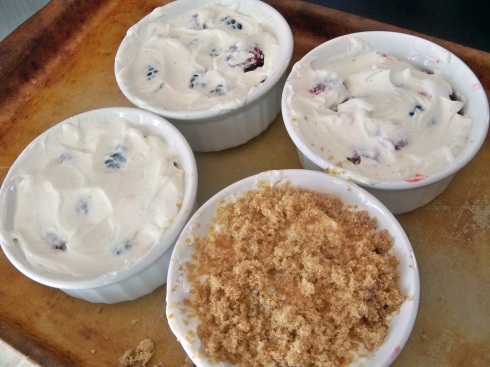
Then you throw a whole lotta brown sugar on top.  You can’t go wrong with brown sugar.  Ever.  I could see you eating this for breakfast (it is practically a parfait) or even as a light dessert.  Personally, I would eat it any time of day.  And if you ever try making it with sour cream or creme fraiche or anything instead of yogurt, let me know how it goes!

Brown Sugar Fruit Gratin

2 cups plain greek yogurt
3-4 drops of pure vanilla extract
2 cups bite sized fruit (berries or other fruits sliced up)
1 cup brown sugar

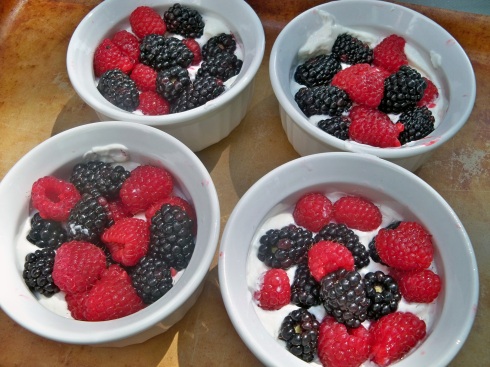
Preheat the broiler on low.  Mix the yogurt with the vanilla extract.  Spread a layer of half the yogurt on the bottom of a shallow baking dish or ramekins.  Add all of the fruit, gently pressing it down into the yogurt.  Spread the remaining yogurt on top of the fruit.  This makes you less likely to crush the berries than just mixing it all together, but if mixing it is easier then feel free because this isn’t a pretty dish by any stretch of the imagination.  Then crumble all of the brown sugar on top, making sure that there are no lumps.  Broil for as long as it takes for the brown sugar to melt and start to bubble a bit (it took me about 10 minutes).  Enjoy!

Ok, now that a month has passed since returning from the family vacation in Nantucket, I figure it is time to share a few of my favorite pictures:

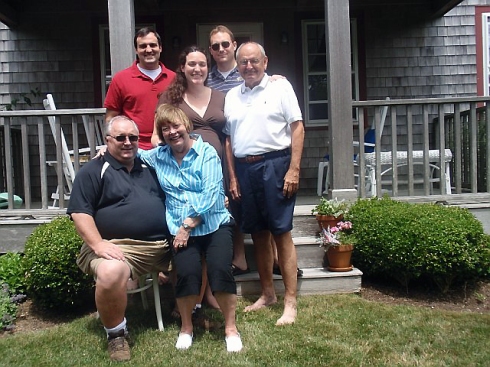
Here is the whole family in front of the rental house.  There were about 100 pictures taken just to make sure that we got a good shot, and as it turned out, the very first one was the best.  Funny how that works.

Another picture of the family from the 4th of July.  Nonnie decorated the table with little American flags and Dan displayed his plate of food for all to see.  What’s more American than flags and food?

Look at the facial expressions during an intense game of beer pong.  Is there any possibility that these two are related?

Jake and I went to the beach.  I won’t say that Jake dragged me there, but I’m fairly certain that had he not been persistent with his puppy dog eyes, the entire vacation on a small island would have been completely beach free for the family. 

Proof that I touched sand without socks on! 

Jake tempting death by playing around in the waves.  It looks like the waves won this round, but Jake didn’t seem to mind.  I, on the other hand, will never enter an ocean again unless a cruise ship is sinking.  Too flipping scary!

Call the coast guard!  I spy a beached whale!  (I kid, I kid)

Dad and Dan called the sky that morning to coordinate outfits. 

We needed to get a picture with this lighthouse before it falls into the ocean.  Which, according to the tour guide, will be happening very soon.  The $10 million houses nearby will also be falling into the ocean.  Talk about a bad investment! 

55 years!  Can you believe that these two love birds have been married for so long AND still like each other? 

Overall, the trip was fabulous and fun.  We somehow went an entire week without killing each other and without getting photographic proof of our daily ice cream trips.  Dan walked an average of 27 miles per day, Dad smoked cigars while laying in the hammock, and I managed to read an entire economics text book.  Success!

Blueberry boy bait is essentially the same as blueberry coffee cake but it has a fun little story behind it.  Supposedly, a teenaged girl entered this cake into the Pillsbury Bake Off in 1954, won second place, and stole the show (evidently, considering it is still a popular cake 56 years later).  She named it after the effect that it had on boys.  So, needless to say, this recipe won’t be passed onto my little girl until at least 56 more years have passed.

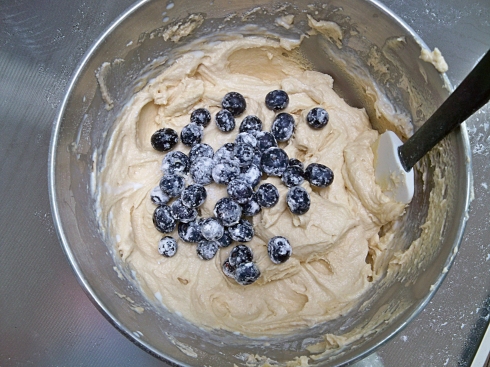
Obviously, this recipe starts with blueberries.  But look beyond them in the picture above and notice the AMAZING berry bowl.  Meghan’s mom, Erin, sent it to me for my birthday and I use it almost as much as the oven.  It is never sitting on the shelf during the summer.  And why would it be?  You can clean the berries and then keep them in the fridge all in the same bowl.  No unitaskers allowed!  Alton Brown would be so proud.

Pieces of this cake are also good to package up and give to the neighbors or whomever you please.  My poor neighbors end up as test subjects for a lot of these recipes that make too much for two people… but they have never complained, so I figure I won’t stop until I see their lights turn out and curtains close every time I walk by.  Actually, one set of neighbors is moving!  I wonder if it has anything to do with the brownies I dropped off a couple of weeks ago…

Regardless, this boy bait is a winner.  It is moist and berrylicious and somehow with the blueberries I don’t feel so bad about all of the butter that goes into it.  Don’t even look below yet.  Let’s just sit here for a minute and imagine that this is health food. 

Ok, you can look now.  But trust me, it’s worth it!

Blueberry Boy Bait (from Smitten Kitchen, who adapted it from Cook’s Country):

2 cups plus 1 teaspoon all-purpose flour
1 tablespoon baking powder
1 teaspoon table salt
16 tablespoons unsalted butter (2 sticks), softened
3/4 cup packed light brown sugar
1/2 cup granulated sugar
3 large eggs
1 cup whole milk
1/2 cup blueberries, fresh or frozen (if frozen, do not defrost first as it tends to muddle in the batter)

Topping:
1/2 cup blueberries, fresh or frozen (do not defrost)
1/4 cup granulated sugar
1/2 teaspoon ground cinnamon

For the cake: Adjust oven rack to middle position and heat oven to 350 degrees. Grease and flour 13 by 9-inch baking pan.

Whisk two cups flour, baking powder, and salt together in medium bowl. With electric mixer, beat butter and sugars on medium-high speed until fluffy, about two minutes. Add eggs, one at a time, beating until just incorporated and scraping down bowl. Reduce speed to medium and beat in one-third of flour mixture until incorporated; beat in half of milk. Beat in half of remaining flour mixture, then remaining milk, and finally remaining flour mixture. Toss blueberries with remaining one teaspoon flour. Using rubber spatula, gently fold in blueberries. Spread batter into prepared pan.

For the topping:

Scatter blueberries over top of batter. Stir sugar and cinnamon together in small bowl and sprinkle over batter. Bake until toothpick inserted in center of cake comes out clean, 45 to 50 minutes. Cool in pan 20 minutes, then turn out and place on serving platter (topping side up). Serve warm or at room temperature. (Cake can be stored in airtight container at room temperature up to 3 days.)

It is way to hot to have the oven on this summer (please forget for a moment about the corn casserole that I just posted), so here is another ice cream recipe.  And this one is for humans!  Much to Buster’s disdain.  He probably still has puppy dreams about the ice cream that I made for him last month.  Wait, no he doesn’t.  He has spent the last several weeks playing with his doggy girlfriend at his grandparents’ house on the lake.   So any dreams that this dog has right now are probably about going back there!

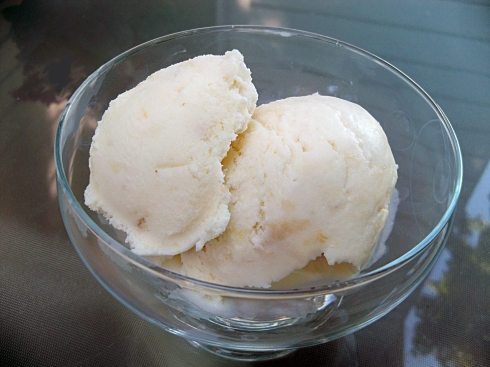
On to the ice cream (do I talk about the dog too much?).  The name six threes is pretty obvious.  It is 3 each of 6 ingredients.  But be warned that this actually makes two batches of ice cream!  I should have realized it while reading how many ingredients were going in there but it somehow slipped right through my head.  And then after the first batch I had to sit around and wait for the ice cream maker to freeze again before making the second batch.  You know where this story goes…

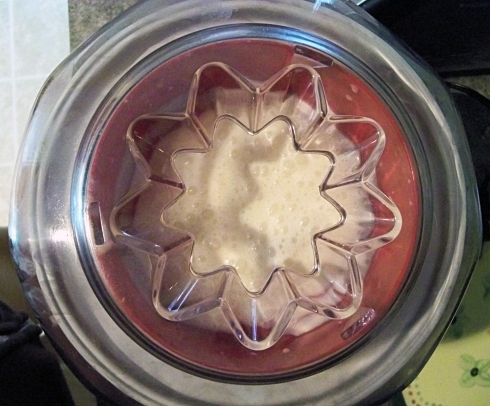
I got impatient while waiting for the ice cream maker to freeze and decided that it was frozen enough and just threw the second batch in there.  Well, it wasn’t “frozen enough” and the second batch never fully froze.  Smart, Lindsay.  So, I just threw it in the freezer and hoped for the best.  It ended up ok, but kind of icy.  Note to self: don’t rush the ice cream.  Or just turn it into six one-and-a-halfs ice cream and forget about all of the refreezing mess.

Six Threes Ice Cream (from AllRecipies.com):

3 cups sugar
3 cups cream
3 cups milk
3 bananas, mashed
3 oranges, juiced
3 lemons, juiced

In a large bowl, whisk together sugar and cream until sugar is dissolved. Mix in the milk, mashed bananas, and fruit juices.

Pour mixture into ice cream maker. Freeze according to manufacturer’s directions, about 45 minutes.

Let’s take a healthy, fresh, delicious summer crop and make it as unhealthy as possible, shall we?  Unhealthy in the best way possible.  I mean, this is really good.  Obviously, considering the recipe came from Paula Deen.  She puts a pound of butter into every food she makes.  Not that there’s anything wrong with that.  It has certainly never stopped me from eating her recipes.

My mom used to make a corn casserole but we called it “corn mush” and I think that it was essentially the same thing as this but in a smaller, deeper baking dish so you had to scoop it out.  I remember one time when I was little I asked my mom what was in corn mush and she looked at me with an apologetic expression and said, “Oh Lindsay, you don’t want to know.  You would never eat it again.”  Of course she was implying that it was just a lot of unhealthy foods that I guess she was ashamed to be giving her family, but in my mind I thought she meant that there was something gross ground up in there.  Why I thought that my mom would put worms or maggots or worse into something that she was eating too is beyond me.  But, either way, it was never the same again. 

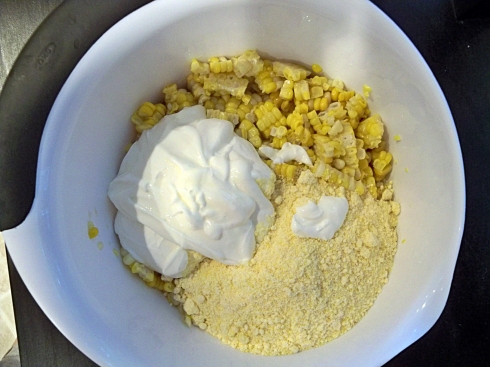
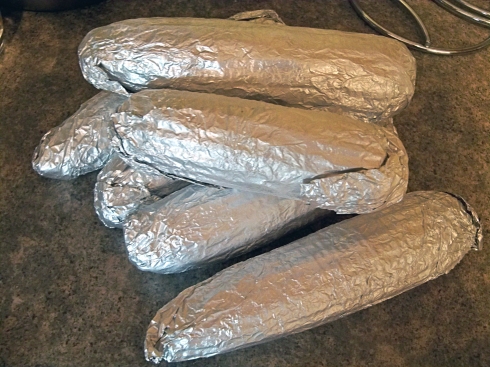
Now, Paula makes this casserole with canned corn.  I have no idea why.  Do they not grow corn in Georgia?  Maybe she was just trying to make the recipe easier for people.  Either way, I used fresh corn instead.  I didn’t add any extra cream or anything (one of her cans was creamed corn) and it still ended up great.  I actually had leftover corn, so I shucked it and froze it wrapped in aluminum foil for about a week like so:

And it ended up great!  Why buy corn and freeze it during corn season?  It was on sale, but only if you bought 12 ears of it.  And 12 ears of corn is a little ridiculous for a household of 2.  So that’s my story, but really fresh corn would probably be even better.  Just boil it and saw it off and you’re good as gold!

Corn Casserole (adapted from Paula Deen):

6 ears of fresh corn
1 (8-ounce) package corn muffin mix (like Jiffy)
1 cup sour cream
1/2 cup (1 stick) butter, melted
1 to 1 1/2 cups shredded cheddar cheese

Preheat oven to 350 degrees.  Bring a pot of water to a boil and put the shucked corn cobs in.  Let the water come back to a boil and turn it off and let it sit, covered, for about 12 minutes.  Let it cool a little bit and then cut the corn off the cob. 

In a large bowl, stir together the corn, corn muffin mix, sour cream, and melted butter. Pour into a 9 by 13-inch casserole dish sprayed with cooking spray. Bake for 45 minutes, or until golden brown. Remove from oven and top with cheddar. Return to oven for 5 to 10 minutes, or until cheese is melted. Let stand for at least 5 minutes and then serve warm.

Enter your email address to subscribe to this blog and receive notifications of new posts by email.

Join 11 other subscribers

Post Categories